
Sod Installation Laguna Hills CA
for New and Replacement Home Lawns
Fresh sod can change the look of a yard in a single day, and that speed is exactly why the work underneath it deserves so much attention. The rolls go down quickly. The soil, the grade, and the sprinkler coverage beneath them decide whether the lawn still looks even when summer arrives. If your search for sod installation Laguna Hills CA brought you here, the most useful place to start is not the grass itself but the yard it will be growing in.
This page is written for Laguna Hills homeowners and residential property owners planning residential sod installation in a front or backyard. It covers natural grass lawn installation over bare ground as well as lawn replacement in Laguna Hills yards where the existing turf has thinned, browned out, or settled unevenly. We walk through the conditions we look for before recommending new sod, how the shape and access of a yard change the job, how grass choice follows sun and water, what installation day involves, and what to gather before you ask us for a free estimate. If you would like a broader look at how we approach these projects throughout our service area, our professional sod installation services page is a good companion to this one.

Get a Free Sod Installation Estimate for Your Laguna Hills Lawn
Planning a new lawn or replacing a worn one? Send us an approximate lawn size and a few photos, and we will visit to measure, test the sprinklers, and prepare a free estimate covering removal, preparation, and installation.
Will New Sod Fix the Problems in Your Current Lawn?
New sod replaces worn grass, but it does not correct the conditions that wore the grass out. When a lawn declined because one sprinkler zone never reached a corner, because water collects in the same low area after every cycle, or because a tree has been shading the turf a little more each year, fresh sod laid over those same conditions usually starts failing in the same pattern. That is why we read the old lawn before we plan the new one.
Dry, Straw-Colored Patches
Brown areas with clear edges usually point to irrigation coverage rather than the grass. A clogged or mismatched nozzle, a head tilted by years of mowing, a shrub that has grown into the spray, or low pressure on one zone can leave a band of turf with too little water. These patches often show up along walkways, near the driveway, or at the far edge of a zone, where spray patterns are supposed to overlap but do not.
Soft, Soggy, or Yellowing Areas
Turf that stays wet hours after watering is telling a different story. The cause may be a low spot in the grade, heavily compacted soil that will not let water move down, a downspout emptying onto the lawn, or a leaking valve or line. Sod placed over a wet area tends to stay thin and weak, so we would rather find the source and correct the grade or the leak first.
Thin Grass in Heavy Shade
Many lawns are planted when the trees around them are small. Years later, the canopy and the house itself can leave part of the yard in shade for most of the afternoon, and sun-loving turf gradually thins out. Before replacing that section, it is worth deciding whether it should be planted with a more shade-tolerant grass or whether the lawn edge should move back and the shaded area become a bed instead.
A new lawn over prepared bare ground has no old turf to read, so we look at the soil, the grade, and the irrigation layout directly. Yards left bare after a remodel, a patio project, or earlier landscape removal often have compacted soil, buried debris, or a sprinkler system that was capped or damaged during construction.
How Do Yard Size, Slope, Access, and Soil Change a Sod Project?
These site conditions shape how much preparation and labor a project needs, and in many yards they affect the scope more than the sod does. Before we recommend a plan, we look at each of the following:
- The lawn area and its shape. Sod is ordered by the square foot, and curved beds, planters, and narrow strips add cutting time and waste compared with a simple rectangle.
- Side-yard and gate access. Pallets of sod are heavy. When they can be staged near the lawn the work moves quickly, but when every roll has to travel through a narrow gate by wheelbarrow, labor increases. The same route carries the old turf out.
- Slope. Lawn areas with a grade change shed water faster at the top and collect it at the bottom. Rows are laid across the slope, and steeper sections may need to be staked until the roots take hold. Some slopes are simply too steep to be a practical lawn.
- Soil condition. Compacted, rocky, or debris-filled soil needs more work before it can support healthy roots.
- Drainage. Any area that holds water needs a plan before installation, not after.
- Existing turf. Removal is a separate step with its own labor and disposal, and spreading grasses may take more thorough removal to keep them from returning.
Example: A Sunny Front Lawn Along the Driveway
Picture a rectangular front lawn bordered by a concrete driveway on one side and the entry walk on another, in full sun for most of the day. Access is easy because the sod can be staged on the driveway a few steps from where it will be laid. The challenges are at the edges. Concrete holds heat and reflects it onto the turf beside it, so those outer rows dry faster than the middle of the lawn. Heads along the driveway are often adjusted to keep spray off the pavement and end up underwatering the strip beside it. On a lawn like this, we pay close attention to edge coverage and to setting the finished grade so the new sod sits flush with the driveway rather than above it.
Example: A Partly Shaded Backyard Behind a Narrow Gate
Now picture a backyard reached only through a narrow side gate, with morning sun and afternoon shade from the house and a mature tree. Everything moves through that gate by hand or wheelbarrow, including the removed turf, soil amendments, and every roll of new sod, so access becomes a larger part of the labor. The shade changes the grass discussion, and surface roots near the tree can limit how much soil preparation is possible close to the trunk. In a yard like this, we may suggest pulling the lawn edge back from the canopy and choosing a grass better suited to partial shade for the area that remains.
Which Grass Fits Your Sun Exposure, Foot Traffic, and Watering?
The best grass for a Laguna Hills yard is the one that matches how much sun the lawn gets, how hard it will be used, and how much water you can reliably give it. We keep the comparison practical:
- Sun exposure. Bermudagrass needs full sun and thins quickly in shade. St. Augustinegrass tolerates more shade than most warm-season grasses. Tall fescue handles partial shade reasonably well.
- Foot traffic. Bermudagrass stands up to heavy use and recovers quickly from wear, which suits yards where children and pets spend a lot of time. St. Augustinegrass forms a thick, coarse turf that handles moderate use.
- Watering capacity. Warm-season grasses such as Bermudagrass and St. Augustinegrass generally use less water than tall fescue during summer, but they slow down and may lose color in cooler months. Tall fescue tends to stay greener through winter in exchange for higher summer water use.
A front lawn in full sun and a shaded backyard on the same property may be better served by different grasses, and availability varies by supplier and season. We will talk through the options that suit each area of your yard. For a fuller comparison of turf species and their tradeoffs, read our guide to choosing a grass type for Southern California.
Correct Dry Zones and Puddles Before Your New Sod Goes Down
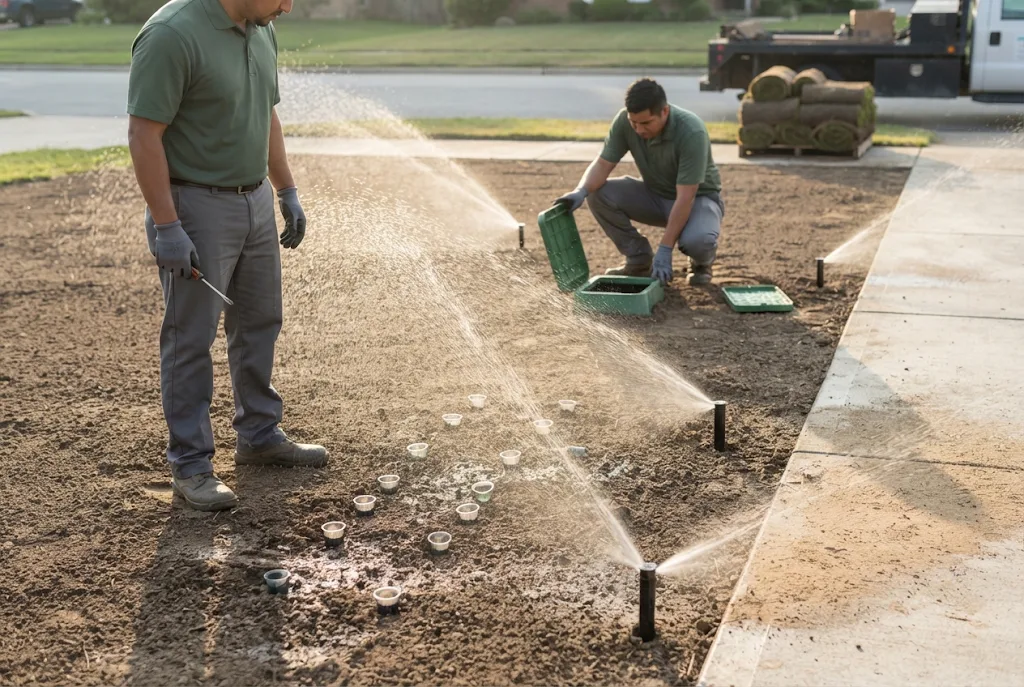
Sod laid over a weak sprinkler zone, a low spot, or a compacted patch tends to fail where the old lawn did. We check coverage, grading, and shade first, so your replacement lawn starts on ground that is ready for it.
What Preparation Happens Before the First Roll of Sod Goes Down?
Preparation is where most of the work in a sod project happens, and it follows a sequence: remove what is there, improve the soil, and shape the final grade. Skipping or compressing any of these steps tends to show up later as uneven turf, slow rooting, or puddles.
Removing the Existing Lawn
When an old lawn is being replaced, we cut it out rather than covering it. A sod cutter lifts the turf along with its roots and a thin layer of soil, and the strips are rolled up and hauled away when disposal is part of the scope. Turf left in place sits between the new sod and the soil as a barrier the young roots have to push through, and as it rots it settles at different rates, which shows up months later as low spots. Lawns invaded by spreading grasses or persistent weeds can need extra attention during removal, because pieces left in the soil may grow back through the new lawn.
Preparing the Soil
With the surface cleared, the soil is loosened so new roots can move into it easily. Rocks, old roots, irrigation scraps, and construction debris come out at this stage. Where the soil is heavily compacted or poor, amendments may be worked in. The goal is a root zone that drains well and stays moist without staying wet.
Setting the Finish Grade
Finish grading is what makes a new lawn look intentional. The surface is raked smooth, firmed so it will not settle unevenly, and shaped to move water away from the house and toward the yard’s drainage path. Because sod arrives with a layer of soil attached, the prepared grade is set slightly below walkways, patios, and driveway edges. That lets the finished lawn sit flush with the hardscape instead of rising above it.
Why Should Sprinkler Coverage Be Checked Before Installing Sod?
Checking sprinkler coverage before installing sod matters because new sod depends entirely on even watering during establishment, and once the lawn is down, every sprinkler adjustment means lifting freshly laid turf. A dry strip that went unnoticed in the old lawn can turn new sod brown within days.
Before installation, we run each zone and watch it work. We look for heads that do not pop up or rotate, nozzles that do not match the rest of the zone, spray blocked by plants or fences, overspray onto walls and pavement, and gaps where patterns fail to overlap. Heads also need to be raised or lowered to match the new finish grade so they clear the turf without becoming a tripping hazard. Sprinkler repairs needed before sod installation are usually completed through our sprinkler repair services, and if a zone needs more than adjustment, we explain what we found and what the repair involves so you can decide before the lawn goes in.
Watering rules matter too. According to the City of Laguna Hills, two water districts serve its residents, El Toro Water District and Moulton Niguel Water District, depending on the address. Each district sets and updates its own outdoor watering guidance, so it is worth checking your district’s current rules, including any provisions for watering new plantings, before you schedule installation.
What Happens on Installation Day?
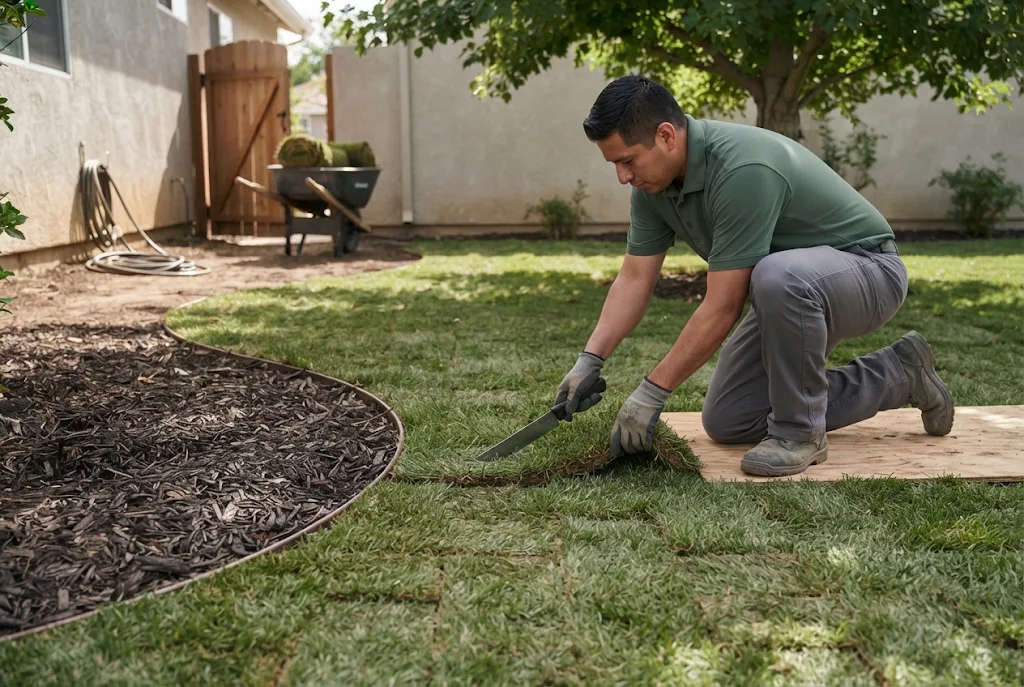
On installation day, the sod should be delivered and laid the same day, because cut sod is perishable. Rolls left stacked on a pallet heat up and can begin to yellow quickly, especially on a warm afternoon. A typical installation follows this order:
- Lightly moisten the prepared soil so it is damp but not muddy.
- Start the first row along a straight edge, such as the driveway or a walkway, so the rest of the lawn has a true line to follow.
- Stagger the seams from row to row in a brick-like pattern, so no long seam runs across the lawn.
- Push each piece tight against its neighbor without overlapping or stretching it, since stretched sod shrinks back and leaves gaps.
- Fit the sod around beds, curves, sprinkler heads, and edges with a sharp knife, keeping full pieces along the outside where possible and avoiding small slivers that dry out quickly.
- Lay rows across any slope and stake the steeper sections so the pieces cannot slide while they root.
- Roll the finished lawn to press the sod into firm contact with the soil, eliminating air pockets beneath it.
- Water thoroughly so moisture passes through the sod and into the soil below.
Good soil contact is the detail everything else depends on. Roots grow from the sod into moist soil directly beneath it, and any air gap, uneven spot, or dry layer slows that process. On larger lawns or hot days, we water sections that are already in place while the rest of the lawn is still being laid.
Talk Through Your Laguna Hills Sod Project With Our Team
Call (888) 601-1117 or email info@landscaper-near-me.com with your lawn size, photos, and any sprinkler or drainage concerns. If a phone call from us suits your schedule better, use the callback request and tell us the best time to reach you.
How Should You Care for New Sod During the First Few Weeks?
For the first few weeks, new sod needs consistent moisture, very little foot traffic, and patience before its first mowing. The details depend on the grass, the season, and the weather, so we review the starting plan with you when the installation is complete.
Early watering keeps the sod and the top layer of soil beneath it consistently moist, which often means daily watering at first and more during hot spells. As the roots grow, watering shifts gradually toward deeper, less frequent cycles that encourage the roots to follow the moisture down. The University of California guidance on irrigating new lawns explains why uniform coverage and avoiding saturated soil both matter during this stage.
Keep children, pets, and regular foot traffic off the new lawn while it roots, and walk on it only as needed to check the watering. To see whether the roots have taken hold, try tugging up the corner of a piece; if it holds against the soil, rooting is under way. The first mowing comes only after the whole lawn passes that test and the blades have grown a bit past the height you plan to keep them at, and the mower blade should be sharp so it cuts cleanly instead of pulling. Our guide to caring for freshly installed sod covers the watering schedule, rooting checks, and first mowing in more detail.
What Affects the Cost of a Sod Installation Estimate in Laguna Hills?
A sod installation estimate in Laguna Hills is shaped less by the price of the grass than by everything around it. Square footage is the starting point, and the rest of the scope depends on the yard. These are the factors we account for:
- Total square footage and the shape of each lawn area
- The sod variety selected and its availability
- Removal of the existing lawn and haul-away of turf, roots, and excess soil
- Soil preparation, including loosening, debris removal, and amendments where needed
- Finish grading and any drainage corrections
- Access for materials and equipment, including narrow gates and side yards
- Sprinkler adjustments and repairs
Sprinkler repairs are sometimes quoted separately from the sod work. Their extent is not always clear until each zone has been tested, and keeping them as a distinct line item lets you see exactly what the irrigation needs. Drainage corrections can work the same way. When you compare sod installers in Laguna Hills, ask each one whether removal, disposal, soil preparation, grading, and sprinkler adjustment are included. A low number that leaves out removal or grading is not really a lower price, only a smaller job.
How Do You Request a Free Sod Installation Laguna Hills CA Estimate?
The fastest way to a useful free estimate is to share a few details about your yard when you first contact us. You do not need drawings or exact numbers. Three things help most:
- An approximate lawn size. Rough length and width for each area is enough to begin. If the yard has curves or several sections, break it into simple shapes. A future article on how to measure your lawn for sod will cover this step by step, and we confirm the measurements on site either way.
- Site photos. A wide photo of each lawn area, close-ups of problem spots, and a picture of the gate or path to the backyard tell us a lot before we arrive.
- Known sprinkler or drainage problems. Mention dry corners, broken heads, overspray, puddles that linger after watering, or zones that never seem to work right.
With that information, we can arrive prepared to measure, test the sprinklers, look at grading and drainage, and talk through grass options for each part of your yard. The estimate then lays out removal, preparation, installation, and any separately quoted irrigation work, so you know what is included before anything is scheduled.
Whether you are planning new sod for front and backyards or replacing a single tired lawn, sod installation Laguna Hills CA homeowners can rely on starts with a careful look at the ground beneath it. You can reach Landscaper-Near-Me.com by phone at (888) 601-1117 or by email at info@landscaper-near-me.com, or request a callback through our contact page if you would rather we call you. Send your lawn size and photos when you write, and we will set up a visit and put together your free estimate.
FAQ's - Frequently Asked Questions
Measure the length and width of each lawn area in feet and multiply them. For curved or irregular areas, divide the lawn into rough rectangles and add them together. An approximate number is enough to start the conversation, and we confirm exact measurements during the site visit before any sod is ordered.
Often, yes. On moderate slopes we lay the rows across the grade and may stake pieces so they stay in place while rooting. Slopes drain quickly at the top and hold water at the bottom, so watering needs extra attention. Very steep areas may be better suited to ground cover or planting beds, and we will tell you if we think that is the case.
Laguna Hills is served by two water districts, El Toro Water District and Moulton Niguel Water District, depending on the address. Your water bill shows which one serves you. Because each district sets its own outdoor watering guidance and rules can change, we recommend checking your district’s current requirements before scheduling installation.
Seams are usually visible for a short time after installation and fade as the grass grows and knits together. Seams that open, shrink, or turn tan are a sign that the edges are drying out and need more water. Tight, staggered seams and good soil contact help the lawn fill in evenly.
We test each zone during the estimate and explain any problems we find. Repairs may be quoted separately so you can see exactly what the irrigation needs. We recommend completing them before installation, since fixing a buried line or moving a head after the sod is down means cutting into the new lawn.
Yes. Many homeowners phase the work, starting with the lawn they see most. If you plan to do both eventually, it helps to choose grasses with both areas in mind, and we can note the backyard scope during the same visit so you have the information ready when you are.
Ideally the same day. Cut sod is a living product, and rolls left stacked on a pallet build up heat and can yellow quickly, particularly in warm weather. We schedule delivery to match installation so the sod goes onto prepared soil and is watered without delay.
Usually after a few weeks, but the calendar matters less than the roots. When pieces no longer lift at the corners and the grass is a little taller than its target height, the lawn is ready. A mower crossing sod that is still loose can drag pieces out of line, so let the first cut be a light one on dry turf. Warm and cool seasons change the timing, and we tell you what to watch for with your grass.