
Sod Installation Tustin CA:
Planning a Lawn Replacement That Holds Up
When you start collecting quotes for sod installation Tustin CA homeowners often find that two estimates for the same yard can describe very different jobs. One may cover little more than delivering and laying grass. Another may include removing the worn turf, loosening compacted soil, adjusting the sprinklers, and setting the new lawn so it finishes level with the driveway. The difference shows up a few months later, when one lawn is still knitting together evenly and the other has dry seams along the pavement and a soft spot that never seems to drain.
This page is written for Tustin homeowners and residential property owners who are weighing a lawn replacement in Tustin or a new lawn on prepared soil. We explain what we look at before recommending a grass, what a complete scope should include, how sprinkler and drainage conditions change the plan, what a well-finished installation looks like, and which details help us prepare an accurate free estimate. Readers who want the broader picture of how we handle installation projects across our service territory can also review our professional sod installation services.

Request a Free Sod Installation Estimate for Your Tustin Home
Send us your approximate lawn size and a few photos. We will schedule a visit to measure the yard, check the sprinklers, and outline old turf removal, soil preparation, and installation in a free written estimate.
What Kinds of Lawn Projects Fall Under Sod Installation in Tustin?
Most residential sod installation in Tustin falls into one of three situations, and each one starts from a different point. Knowing which describes your yard makes it easier to compare estimates fairly.
Replacing an Existing Lawn
This is the most common request we receive from homeowners: a front or back lawn that has thinned out, filled with weeds, browned in patches, or settled unevenly over the years. Old lawn removal and sod replacement go together here. The existing turf, its roots, and the weeds mixed into it have to come out so the new sod can sit directly on prepared soil. Leaving old grass underneath creates a spongy layer that keeps new roots from reaching the ground.
Installing Sod on Bare Soil
Some yards have no lawn at all. The area may have been cleared after a renovation, left as dirt after a new patio was poured, or stripped during earlier landscape work. A new lawn installation in Tustin on bare ground skips the removal step, but the soil usually still needs work. Exposed soil is often compacted from foot traffic or equipment, mixed with construction debris, or graded unevenly.
Restoring a Defined Lawn Section
Other projects involve only part of a yard, such as a strip disturbed by a sewer line repair, a section damaged during a fence or hardscape project, or one side of a backyard that never recovered. These smaller jobs still need edges cut cleanly, soil prepared to the right height, and a grass that will blend with the lawn that stays. Matching an existing lawn is not always exact, because a new piece may differ slightly in color or texture until it matures.
Some homeowners are also deciding between laying sod and starting a lawn from seed. Sod gives you a finished surface right away and avoids the bare-soil stage, while seed costs less up front but needs a longer and more careful establishment period. That comparison comes down to timing, budget, and how soon the yard needs to be usable. Our future guide on comparing sod and seed for a new lawn will cover it in more depth; on this page, we focus on natural grass sod installation.
How Do You Choose the Right Sod for Your Tustin Yard?
The right grass depends less on what looks best on the pallet and more on how the specific lawn area behaves through a full year. Before recommending a turf type, we look at four conditions: daily sun exposure, foot traffic, sprinkler coverage, and how much summer heat the area absorbs.
A Sunny Front Lawn Beside Pavement
Picture a front lawn that faces the street, bordered by a concrete driveway on one side and a sidewalk along the front. It may receive full sun for most of the day, and the pavement around it reflects heat back onto the grass edges during the warmer months. Those edges dry out faster than the middle of the lawn. In a setting like this, heat tolerance and drought resilience matter most. Warm-season grasses such as hybrid Bermudagrass, zoysiagrass, and St. Augustinegrass generally perform well in full sun, while a tall fescue blend may need more water to stay green through a hot summer.
A Partially Shaded Backyard
Now picture a backyard with a covered patio along the house, a mature tree in one corner, and a block wall that shades part of the lawn every afternoon. Grass here may get only part of the day’s direct sun, and the shaded sections stay damp longer. Hybrid Bermudagrass tends to thin in shade, so a more shade-tolerant option such as St. Augustinegrass or tall fescue is usually a better fit. Where an area gets very little direct sun, no lawn grass may hold up well, and we would rather tell you that before the sod goes down.
Traffic, Heat, and Seasonal Color
A backyard where kids and dogs play every day needs a grass that recovers from wear, while a front lawn that people rarely walk on can prioritize appearance and water use. Seasonal color matters too. Many warm-season grasses slow down and lose color during cooler months, while cool-season tall fescue stays greener in winter but works harder during summer heat. Our article on choosing a grass type for Southern California compares the common options and their trade-offs in detail.
Is Your Sprinkler System Ready for New Sod?
A sprinkler system that waters an established lawn adequately may not be good enough for new sod. During the first weeks, every piece needs consistent moisture across its full surface, including the edges and corners. Gaps in coverage that an older lawn tolerated will show up quickly as brown seams and shrinking pieces.
Before installation, we run each zone and look for the problems that cause trouble in a newly sodded lawn:
- Dry corners and edges. Heads that do not reach the far corners of a lawn, or that are blocked by shrubs or tall grass, leave sections that dry out every day.
- Overspray onto pavement. Water landing on the driveway, sidewalk, or patio is wasted, and it usually means the lawn edge next to that surface is not getting its share.
- Pooling and runoff. Water that collects in a low area or runs off a slope points to grading problems, compacted soil, or a run time set longer than the soil can absorb.
- Broken, tilted, or sunken heads. A head sitting too low or leaning to one side sprays unevenly, and it may end up buried once new sod raises the lawn surface.
When Irrigation or Drainage Needs Attention First
Some issues can be corrected as part of preparation, such as raising a head to the new finished grade or replacing a cracked nozzle. Others should be handled before installation is scheduled, such as a leaking lateral line, a valve that does not open, or a zone that cannot cover its area without moving heads. That is why we often recommend sprinkler repair before laying new sod. Once the lawn is down, a buried leak is harder to find and the repair tears up new turf.
Drainage deserves the same attention. If water stands in one part of the yard for hours after irrigation or rain, laying sod over it usually leads to a soft, yellowing patch. In those cases, the grade may need to be reshaped or the cause investigated before sod goes down. A future article on fixing standing water before replacing a lawn will explore those corrections further.
Watering rules also matter during establishment. Depending on the address, homes in Tustin receive water service from either the City of Tustin’s water system or the Irvine Ranch Water District, and each supplier may publish its own watering guidelines. We suggest checking with your supplier about current rules before you schedule installation.
Replacing a Worn Lawn? Check the Sprinklers and Soil First
New sod laid over dry corners, overspray, or a low spot that holds water tends to fail in the same places as the old lawn. We test each zone and look at grading before installation so those problems are corrected first.
Sod Installation Tustin CA Estimates: What Should the Scope Include?
A sod installation estimate in Tustin should tell you exactly what work is included, not just the square footage of grass being delivered. When you compare proposals, look for these scope items, and ask about any that are missing.
- Measurement. The lawn area should be measured on site, including curves, planting bed cutouts, and narrow side strips. Accurate measurement keeps the sod order close to what the yard needs.
- Old turf removal and disposal. If an existing lawn is being replaced, the estimate should state how it will be removed and whether hauling away the turf, roots, and excess soil is included.
- Soil preparation. This may include loosening compacted soil, removing rocks and debris, and blending in amendments when the existing soil calls for them.
- Final grading. The surface should be raked smooth and shaped so water moves away from the house and does not collect in low spots.
- Drainage assessment. Any area that holds water should be identified, along with what the estimate does or does not include to address it.
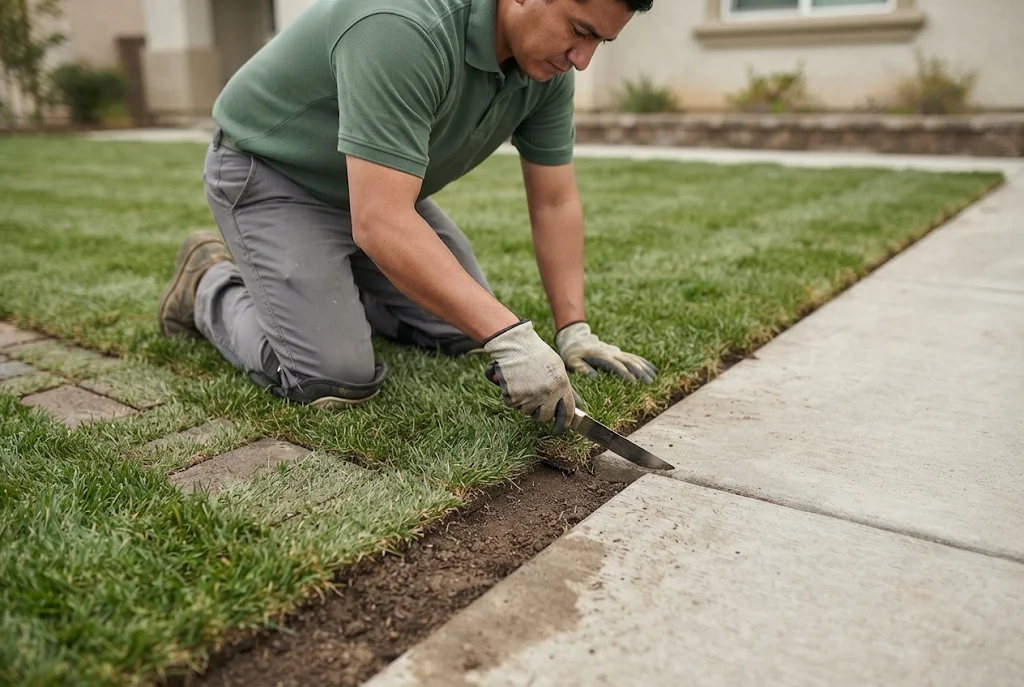
- Finished height. The prepared soil should sit low enough that the new sod finishes even with walkways, patios, and driveway edges, without rising above them or dropping into a trench.
- Sprinkler adjustments. Raising heads, correcting nozzles, or repairing zones should be listed if they are part of the work.
Finished height is easy to overlook and hard to correct later. Sod arrives with a thin layer of soil attached, and the University of California notes that this layer should be about three-quarters of an inch to an inch thick. If the prepared grade is not set lower to account for it, the new lawn can end up sitting above the sidewalk, which makes edging difficult and can send water onto the pavement. Along planting beds, the edge should be cut cleanly so mulch and soil from the bed do not wash onto the lawn.
A clear estimate also states what is excluded. Ongoing lawn maintenance, larger irrigation upgrades, or tree root removal may be quoted separately. Knowing this up front keeps the comparison between estimates honest.
How Removal, Access, Soil, and Sprinklers Change a Lawn Replacement
To show how the scope comes together, consider a possible lawn replacement in Tustin. This is an illustrative example of conditions a homeowner may encounter, not a description of a specific completed project.
A single-story home has a backyard lawn of roughly 800 square feet behind a side gate. The lawn is mostly worn tall fescue mixed with Bermudagrass that crept in from a neighbor’s yard, along with clover and bare spots near the patio. The homeowner wants a full replacement before summer.
Removal
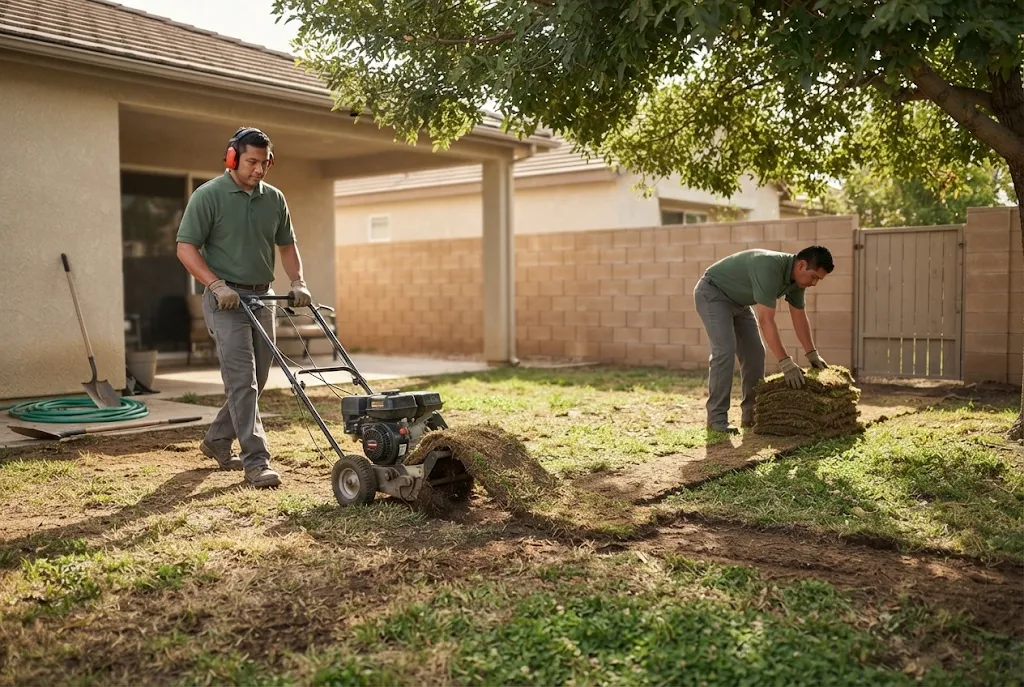
Because the Bermudagrass spreads by underground stems, cutting off the top layer may not be enough. Pieces left in the soil can regrow through the new sod. The removal plan has to account for that, which affects how much material is stripped and how the area is cleared before preparation.
Site Access
The only path to the backyard is a side yard about four feet wide with a gate at the end. A sod cutter may fit, but pallets of sod cannot be delivered directly to the lawn. Old turf comes out through that path, and new rolls are carried back through it. Narrow access adds labor time, and a good estimate reflects it rather than surprising the homeowner later.
Soil Condition
Once the old turf is removed, the soil near the patio turns out to be hard-packed, and a section along the back wall holds leftover gravel from an earlier project. The compacted area needs loosening, the gravel has to be raked out, and the grade near the patio is reshaped so water flows toward the lawn instead of toward the house.
Sprinkler Readiness
A test of the irrigation zones shows that one head along the fence is tilted and sprays into the block wall, leaving a dry strip. Another head near the patio sits too low to clear the new sod. Both are corrected before the new lawn is laid. If the test had found a leaking line or a zone that could not reach the back corner, that repair would have been scheduled first.
Each of these details changes the scope of work without changing the size of the lawn. Two backyards of the same square footage can require very different amounts of labor, which is why we prefer to see the yard or review photos before giving a firm number.
What Happens on Installation Day?
Once removal, soil preparation, grading, and sprinkler adjustments are complete, installation itself moves quickly. Sod is a living product, so we schedule delivery for the day we install it.
The prepared soil is lightly moistened so the new roots meet damp ground rather than dry, hot dirt. We begin laying along a straight edge, such as a walkway or a guide line set across the lawn, and work outward from there. Each row is offset from the one before it so the short ends do not line up, much like a brick pattern. Pieces are pushed snugly against each other without stretching or overlapping, and the edges are trimmed with a sharp knife around curves, sprinkler heads, and bed lines.
When the lawn is in place, it is rolled to press the sod into the soil and remove air pockets, then watered thoroughly. The University of California sod installation steps from the UC Guide to Healthy Lawns describe the same basic sequence, which is a useful reference if you want to compare an installer’s approach against established guidance.
Before we leave, we review the first watering instructions with the homeowner and confirm that the controller is set for the establishment period. If you are planning a business, HOA, or apartment property lawn rather than a home, our commercial sod installation page explains how those larger projects are scheduled and phased.
Compare Your Options With a Clear, Itemized Lawn Plan
Call (888) 601-1117 or email info@landscaper-near-me.com to talk through your yard. Prefer a call from us? Request a callback, and we will follow up to discuss removal, preparation, and a timeline that fits your home.
How Can You Tell a Sod Installation Was Done Well?
A well-installed lawn looks uniform from the street, but quality shows up most clearly when you look closely in the first few days. Walk the lawn’s perimeter and check a few specific things.
Staggered Seams
The short ends of each piece should be offset from row to row rather than lined up in a straight grid. Staggered seams help the lawn knit together evenly and make the joints less visible as the grass grows in. Long, continuous seams are more likely to open up and dry out.
Close-Fitting Edges
Pieces should butt tightly against each other with no visible soil showing between them. Small gaps tend to widen as sod dries, and they leave room for weeds. Along walkways, patios, and the driveway, the sod should meet the edge cleanly and sit level with it. Around planting beds and sprinkler heads, the cuts should be neat and follow the intended line.
Good Contact With the Soil
Press down on a piece in a few places. It should feel firm and settled, not springy or hollow. Air pockets under sod keep roots from reaching the soil and often show up as brown spots within the first week. If you notice ridges, dips, or pieces that rock when stepped on near the edges, mention them right away so they can be corrected while the sod is still loose.
Watering, Rooting, and First Mowing for New Sod in Tustin
The first few weeks after installation decide how well the lawn establishes. New sod depends entirely on watering until its roots grow into the soil underneath, and the right schedule depends on the turf type, weather, sun exposure, and soil conditions in each part of your yard.
Initial Watering
Early on, the goal is to keep the sod and the top inch or so of soil beneath it consistently moist, without leaving the lawn soggy. That often means shorter, more frequent cycles at first, especially on sunny lawns next to pavement during warm weather. Shaded backyard sections may need less water than full-sun front lawns, and running every zone on the same schedule is a common cause of both dry edges and soft, overwatered spots. The University of California advises keeping new sod moist until it is well rooted, which it estimates at about 10 to 14 days.
Rooting Checks
After the first week or so, gently pull up on the corner of a few pieces in different parts of the lawn. If a piece lifts easily, the roots have not taken hold yet. When it resists, rooting is under way, and watering can gradually shift toward longer, less frequent cycles that encourage roots to grow deeper. Our guide to helping new sod take root covers the signs to watch for and what to adjust if a section falls behind.
First Mowing and Foot Traffic
Hold off on the first mowing until the sod is firmly rooted and the grass has grown above its recommended mowing height. Mowing too early can shift or tear pieces that have not anchored. Keep regular foot traffic, pets, and play off the lawn during establishment, and limit walking to what is necessary to check watering. Timing varies with the grass and the season, so we give homeowners specific guidance for their turf type and conditions.
What Helps Us Prepare an Accurate Free Estimate for Your Tustin Lawn?
The more we know about your yard before the visit, the more useful the first conversation becomes. When you contact us about a new lawn or a replacement, these details help us scope the work:
- Approximate lawn size. A rough measurement or even a quick estimate in paces is a good start. We confirm exact dimensions on site.
- Photos. A few wide shots of each lawn area, plus close-ups of problem spots, help us see the condition before we arrive.
- Current turf condition. Let us know if the lawn is patchy, weedy, uneven, or mostly bare, and whether Bermudagrass or another spreading grass has moved in.
- Access. Tell us about gate widths, side yards, steps, or other features that affect how materials and equipment reach the lawn.
- Irrigation concerns. Dry corners, overspray, pooling, broken heads, or zones that never seem to work right are all worth mentioning.
- Removal needs. Let us know whether old turf needs to be removed or the area is already bare.
With that information, we can talk through grass options for each part of the yard, identify any sprinkler or drainage work that should happen first, and outline removal, soil preparation, grading, and installation in a written scope you can compare with confidence.
If you are planning sod installation Tustin CA homeowners can count on to be scoped carefully from the soil up, we are glad to take a look. Call Landscaper-Near-Me.com at (888) 601-1117, email info@landscaper-near-me.com, or request a callback, and we will arrange a time to review your lawn and prepare a free estimate.
FAQ's - Frequently Asked Questions
Once removal, soil preparation, and sprinkler adjustments are finished, many residential lawns can be laid in a single day. The full project takes longer when old turf has to be stripped, soil needs significant work, or an irrigation repair has to be completed first. We outline the expected sequence and schedule in your estimate.
We do not recommend it. Old grass and thatch form a layer that keeps new roots from reaching the soil, and the lawn underneath can decompose unevenly and leave dips. Removing the existing turf and preparing the soil gives the new sod direct contact with the ground it needs to root into.
The mild Orange County climate allows sod to be installed through much of the year, but establishment is easiest when temperatures are moderate and the grass is actively growing. Warm-season grasses establish well from late spring into summer, while cool-season tall fescue does best in spring or fall. Installing during a heat wave increases how much water new sod needs.
Depending on the address, Tustin homes receive water from either the City of Tustin’s water system or the Irvine Ranch Water District. Each supplier sets its own guidance, and rules can change during dry years, so we recommend checking your supplier’s current watering information before scheduling installation.
Yes. We can replace a defined section, such as a strip damaged by construction or one side of a backyard. We try to match the type of grass in the surrounding lawn, but new sod may look slightly different in color or texture at first while it matures and blends in.
When old turf removal and disposal are part of the scope, the removed grass, roots, and excess soil are hauled away rather than left on the property. Your estimate states whether disposal is included so there are no assumptions about what remains after the job.
Not always. What matters most is that we can reach the lawn, pets are secured, gates are unlocked, and water is available. We confirm those details with you when the installation is scheduled, and we review the first watering instructions with you before or after the work is complete.
Keep regular play and pet traffic off the lawn until the sod has rooted firmly into the soil, which you can check by gently lifting a corner. Heavy use too early can shift pieces and damage developing roots. Timing depends on the grass type, season, and watering, and we give guidance specific to your lawn.